Top 10 Ways to Set Up Automatic Drip Irrigation?

Time:2026-09-23 Author:Henry
0%

Learning how to set up an automatic drip irrigation system begins with more than connecting tubing to a timer. It requires matching water delivery to plant needs, soil conditions, pressure, and seasonal weather. This guide introduces the top 10 practical ways to build a dependable system, from planning emitter locations to checking filters, valves, pressure regulators, and drainage. Each method focuses on details that matter in a real garden, such as uneven beds, clogged emitters, muddy corners, and dry containers.

Charles M. Burt, PE, a respected irrigation engineer and founder of the Irrigation Training and Research Center, explains, “Irrigation is the controlled application of water through man-made systems.” That principle keeps the setup practical. Water should reach the root zone, not simply wet the surface. A working timer is not enough. Small mistakes can waste water quietly for weeks.

The following recommendations draw on established irrigation practice and hands-on installation experience. They cover system mapping, water testing, filtration, pressure control, emitter spacing, automation, flushing, seasonal adjustment, and maintenance. Some gardens will need fewer parts. Others will expose problems quickly. That is normal. Soil rarely behaves perfectly.

Expect to adjust the schedule.

A carefully designed system can save water, reduce plant stress, and make daily care easier. However, automation still needs human attention. Inspect tubing after heat, storms, animal activity, or gardening work. The best system is not the most complicated one. It is the one that delivers consistent moisture where roots can use it.
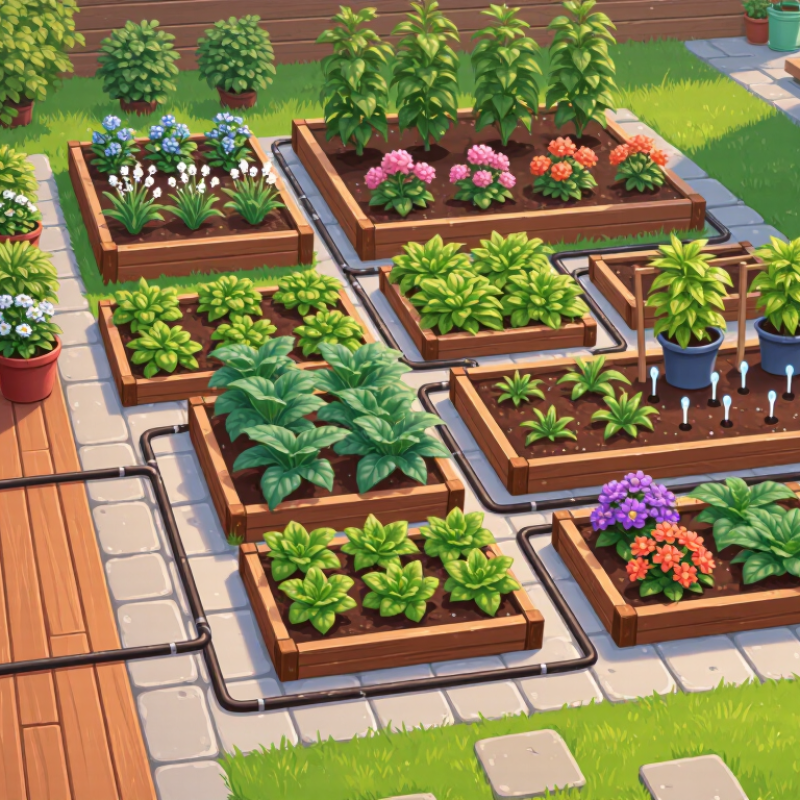
Top 10 Ways to Set Up Automatic Drip Irrigation?

Define Drip Irrigation: EPA Rates It Up to 90% Water-Efficient

Automatic drip irrigation delivers water slowly beside plant roots, reducing evaporation and runoff. The EPA rates efficient drip irrigation as up to 90% water-efficient. Real performance depends on design, soil, pressure, and maintenance.

Map the garden before installing tubing. Divide plants into watering zones. Match emitters to each plant’s needs. Install a filter to stop fine particles. Add a pressure regulator for steady flow. Connect a programmable timer for consistent schedules. Place a moisture sensor in representative soil. Use flush valves at line ends. Cover tubing with mulch, but keep emitters visible. These steps make the system more precise.

Check every connection after the first watering cycle. Look for wet patches, blocked emitters, or dry leaves. Adjust watering after rain, heat, or seasonal growth. Watering at dawn often limits evaporation and fungal stress. My first layout was not perfect. One line crossed a busy path, and several emitters watered empty spaces. A simple sketch would have prevented that waste. Soil should guide the schedule, not the timer alone. Sandy soil may need shorter, more frequent cycles. Clay soil usually needs slower applications and longer pauses. Inspect the filter and flush lines regularly. Small leaks can quietly erase much of the expected savings.

Map the Garden and Group Plants by Water Needs

Before installing automatic drip irrigation, draw a simple map of the garden. Mark beds, containers, paths, slopes, sunny corners, and nearby water connections. Measure each bed rather than estimating its length. A rough map can waste water and tubing.

Group plants by water needs, not by appearance. Leafy vegetables and young seedlings usually need more frequent moisture. Mediterranean herbs, established shrubs, and many native plants prefer drier soil between watering. Keep thirsty plants in one zone and drought-tolerant plants in another. Different zones can then use separate timers or watering schedules.

Check the soil before choosing emitters. Sandy soil drains quickly, while clay holds water near the surface. Place emitters near root zones, but avoid soaking plant stems continuously. On slopes, shorter tubing runs can reduce uneven flow. My first layout looked tidy, but tall plants shaded a dry section behind them. I had to move several lines after checking the soil with my finger.

Walk through the garden during the first few watering cycles. Look for puddles, dry patches, clogged outlets, and water spreading beyond the roots. Use small stakes or flags to record problem areas on your map. Recheck the system after heavy rain and during hotter weeks. Plant roots change as they grow, so a perfect layout today may need adjustment later.

Top 10 Ways to Set Up Automatic Drip Irrigation: Map the Garden and Group Plants by Water Needs

Group plants with similar weekly water requirements on the same drip-irrigation zone. The ranges below are typical warm-season garden targets; adjust them for rainfall, soil type, temperature, and plant maturity.

Choose Emitters: 0.5–2 GPH Flow Rates Suit Most Beds

Top 10 Ways to Set Up Automatic Drip Irrigation

Choose emitters carefully. A 0.5–2 GPH flow range suits most garden beds. Use 0.5 GPH emitters for containers, seedlings, or dense clay soil. They release water slowly, reducing runoff. Use 1 GPH emitters for vegetables and mixed planting beds. Choose 2 GPH emitters for mature shrubs or sandy soil. The U.S. Environmental Protection Agency’s WaterSense guidance reports that drip irrigation can reach about 90% efficiency, compared with roughly 65–75% for conventional sprinklers. That difference matters during hot, dry weeks.

Match the emitter rate to soil texture and spacing. A sandy bed may need emitters spaced closer together. Clay soil usually needs slower cycles and longer soaking intervals. Set a filter and pressure regulator before the tubing. Pressure changes can distort output, especially on long lines. The FAO AQUASTAT database reports that agriculture uses about 70% of global freshwater withdrawals. Small irrigation mistakes can therefore become meaningful waste. I still check actual flow with a measuring cup, because printed rates are not perfect in every installation.

Tips: Start low. Run the system for ten minutes, then inspect the soil beneath each emitter. Moisture should spread sideways, not pool on the surface. Add a timer or soil-moisture sensor, but do not trust automation blindly. Check clogged emitters weekly during the first month. A missed inspection can quietly dry one plant while overwatering another.

Install Filters, Pressure Regulators, Tubing, and Backflow Protection

Automatic drip irrigation works best when the foundation is protected. The FAO reports that agriculture uses about 70% of global freshwater withdrawals. Efficient delivery matters.

A practical ten-step setup begins with mapping planting zones and selecting suitable emitters. Install a screen filter before any narrow tubing. Add a pressure regulator after the filter. Excess pressure can split connectors or flood one bed. Fit approved backflow protection at the water source. Lay mainline tubing along the shortest route. Secure branch tubing beside each plant. Flush open tube ends before installing emitters. Connect a programmable timer, then test every zone. Inspect leaks, clogged outlets, and wet patches weekly. The US EPA WaterSense program recognizes well-managed drip systems as capable of about 90% application efficiency. Real gardens perform worse when filters are ignored.

Tips: Place the filter where removal is easy. I once buried mine under mulch, and cleaning became unnecessarily difficult. Use a pressure gauge during testing. Run each zone for ten minutes, then check soil moisture below the surface. Do not trust a timer alone. Seasonal root growth, sediment, and uneven tubing lengths can change flow. Replace damaged fittings promptly, even when the leak looks minor. A simple maintenance log can reveal repeating failures before plants show stress.

Top 10 Ways to Set Up Automatic Drip Irrigation? - Install Filters, Pressure Regulators, Tubing, and Backflow Protection

No. Setup Method Recommended Component or Action Typical Specification Main Purpose Suggested Inspection Interval Practical Benefit
1 Install a backflow preventer Place an approved backflow protection device immediately after the water source connection. Sized to the supply line; commonly 13–25 mm residential connections Protects potable water from reverse flow Test or inspect annually Improves water safety and code compliance
2 Add a sediment filter Install a cleanable or replaceable filter before the pressure regulator and drip tubing. 120–200 mesh for most drip emitters Removes sand, rust, and pipe debris Flush monthly during use Reduces clogged emitters
3 Fit a pressure regulator Install a regulator downstream of the filter to stabilize pressure in the distribution network. Usually 1.0–2.1 bar for drip systems Prevents tubing and emitter damage Check at the beginning of each season Provides more even water delivery
4 Use a programmable timer or controller Connect a weather-resistant timer between the water source and the irrigation manifold. 1–4 start times per day; 1–7 watering days per week Automates watering schedules Review settings weekly Saves time and limits overwatering
5 Divide the garden into zones Separate plants with similar water needs into independent valve-controlled circuits. One zone per crop or landscape water requirement Matches irrigation to plant needs Reassess when plants or seasons change Improves water-use efficiency
6 Lay out mainline and distribution tubing Run larger polyethylene mainline to the beds, then connect smaller tubing or dripline branches. Mainline often 16–25 mm; branch tubing commonly 13–16 mm Carries water with lower pressure loss Check for kinks every 2–4 weeks Supports consistent flow across beds
7 Select suitable emitters or dripline Match emitter spacing and flow rate to soil type, plant spacing, and root-zone size. Common emitter rates: 1–4 L/h; spacing: 20–60 cm Delivers water directly to the root zone Observe output monthly Reduces evaporation and runoff
8 Add flush ends and air-release points Install flush valves or removable end caps at line ends and air-release valves at high points when needed. One flush point at each lateral end Clears debris and prevents air locks Flush at least monthly Maintains stable emitter flow
9 Secure and protect the tubing Use stakes, anchors, and mulch-safe routing to keep tubing in place and protected from sunlight or damage. Anchor approximately every 60–120 cm Prevents movement and accidental disconnection Inspect after mowing or heavy work Extends tubing service life
10 Test, measure, and adjust the system Run each zone, inspect for leaks, compare emitter output, and adjust runtime according to soil moisture. Measure flow in L/h and check pressure at the zone inlet Confirms uniform system performance Test before use and every 4–6 weeks Detects leaks, clogs, and poor coverage early

Automate Scheduling: Adjust Run Times for Soil, Weather, and Season

Automatic drip irrigation works best when its schedule follows the soil, not a fixed calendar.
In my garden, sandy beds dry quickly, so shorter cycles prevent wilt without flooding the roots. Clay soil needs slower watering and pauses between cycles. Otherwise, water can run across the surface. Check the soil about two inches down before changing the timer. It should feel cool and slightly moist, not muddy.
Small changes matter. I once left a new schedule running through a cool, cloudy week. The leaves looked fine, but the soil stayed saturated. That mistake taught me to inspect the root zone rather than trust the display.

Weather should guide each adjustment.
During hot, windy days, add a little runtime or water more frequently. After meaningful rain, pause the system and check moisture before restarting it. A simple rain gauge improves judgment. Seasonal changes also matter. Spring may require two short watering cycles weekly, while midsummer may need deeper watering three times a week. In autumn, reduce frequency as growth slows and nights cool.
Run the system early in the morning, when evaporation is lower. Watch for runoff, clogged emitters, and dry patches near distant plants. Place small containers under several emitters for five minutes, then compare the collected water. If results vary widely, the schedule may be correct, but the delivery is not. Recheck it after pruning, planting, or changing mulch.

FAQS

How water-efficient can drip irrigation be?

Efficient systems can save up to 90% of water. Actual results depend on soil, pressure, design, and maintenance.

How should a garden be planned before installation?

Sketch the garden first. Divide plants into watering zones, then match each emitter to plant needs.

What equipment improves drip irrigation performance?

Use a filter, pressure regulator, programmable timer, moisture sensor, and flush valves. These parts support steady, cleaner delivery.

Where should the tubing and emitters be placed?

Place tubing beside plant roots. Cover it with mulch, but keep each emitter visible for inspection.

When should the system usually run?

Early morning often reduces evaporation. It may also lower plant stress during hot conditions.

How should watering schedules change with soil and weather?

Sandy soil often needs shorter, frequent cycles. Clay soil needs slower applications and longer pauses.

How can someone check whether water reaches every plant?

Inspect wet patches, dry leaves, clogged emitters, and distant plants. Place small containers under emitters for five minutes.

What mistakes can happen during installation?

My first layout was imperfect. One line crossed a busy path, and some emitters watered empty spaces.

Should a timer control the schedule by itself?

No. Check soil about two inches down. It should feel cool and slightly moist, not muddy.

How often should the system be adjusted and maintained?

Recheck it after rain, heat, pruning, planting, or mulch changes. Inspect filters, flush lines, and connections regularly. Small leaks matter.

Conclusion

Learning how to set up an automatic drip irrigation system begins with understanding why drip irrigation is so effective: it can deliver water slowly and directly to plant roots, achieving up to 90% water efficiency. Start by mapping the garden and grouping plants according to their watering needs. This helps prevent overwatering some plants while leaving others too dry. Select suitable emitters, with flow rates between 0.5 and 2 gallons per hour meeting the needs of most garden beds.

A reliable system should include a filter, pressure regulator, properly sized tubing, and backflow protection. These components help maintain even water distribution and reduce the risk of clogging or damage. Finally, automate the watering schedule with a timer, adjusting run times according to soil type, weather conditions, plant growth, and seasonal changes. Regularly inspect the lines and emitters to keep the system working efficiently.

Henry

Henry

Henry is a dedicated marketing professional with a profound expertise in the company's offerings. With years of experience in the industry, he possesses an impressive understanding of the market dynamics and consumer behaviors that drive success. Henry is committed to sharing his insights through......